Getting Started
Welcome to Truflag. This guide introduces feature flags and walks you through your first complete setup, from account creation to audience targeting.
Welcome to Truflag!
Hello and welcome. Truflag helps you release faster, reduce rollout risk, and control exactly who sees new behavior.
This guide explains why feature flags are useful, then walks you through these first steps:
- Create your Truflag account and open the dashboard.
- Install a Truflag SDK.
- Create your first feature flag.
- Retrieve your flag value from code.
- Create and target your first audience.
You can jump between these steps using the right-side navigation on this page.
First, let's look at what a feature flag is and why teams rely on it.
What is a feature flag?
A feature flag is a runtime control that lets you enable or disable behavior without shipping a new deploy. You define variations and targeting rules in the dashboard, and your app uses the served value to decide what to render or execute.
How feature flags work
Your application asks the SDK for a flag value using a user context and flag key. Truflag evaluates the configured rules for that context and returns the value your app should use.
Input
User context
id + attributes
Evaluate
Flag rules
first-match-wins
Output
Served value
used in app logic
Why feature flags are useful
- Roll out to small audiences first and reduce release risk.
- Roll back quickly by changing serving configuration instead of redeploying.
- Target users precisely by identity and attributes.
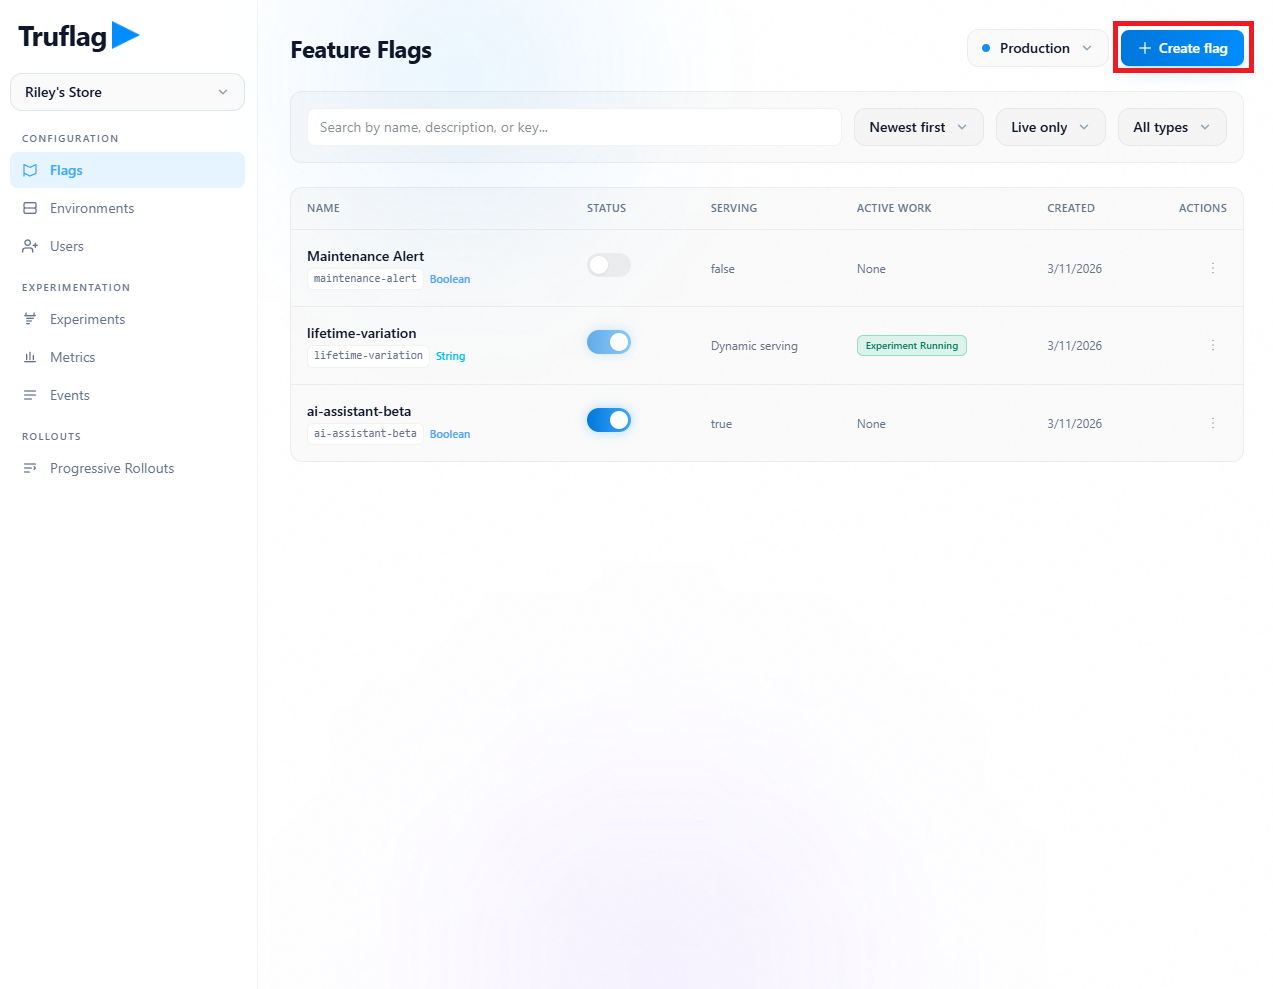
1. Create your Truflag account
Start by signing in to Truflag and opening your workspace. The Flags list is where you will create and manage flags across environments.
- Create your workspace and sign in to the dashboard.
- Open
Configuration -> Flags. - Confirm you are in the correct environment.
Flags list in the dashboard. This is where you create and operate feature flags.
2. Install an SDK for your codebase
Next, install a Truflag SDK in the runtime you use today. Open your terminal and run the install command for your platform.
React
npm install react-featureflags-clientReact Native
npm install react-native-featureflags @react-native-async-storage/async-storageMore SDK options: SDK overview.
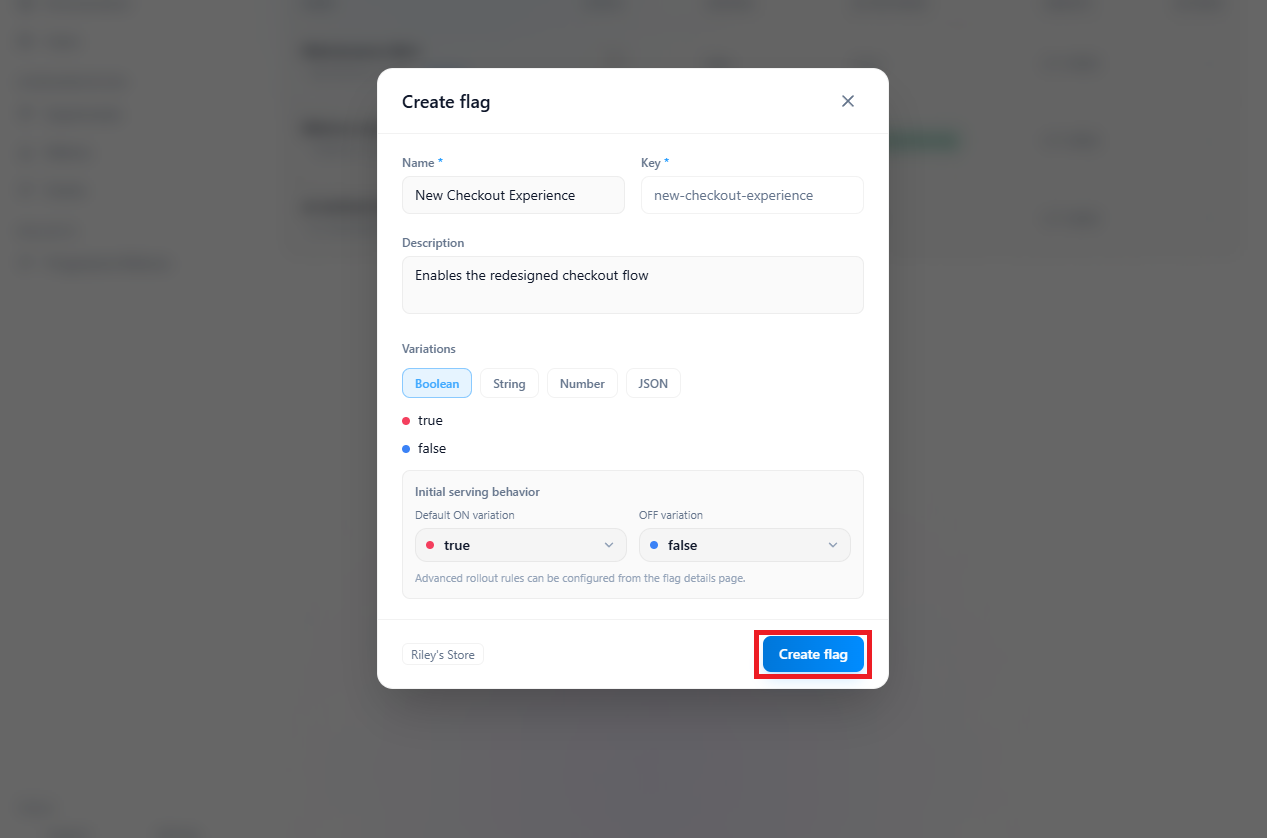
3. Create your first feature flag
Great. You're ready to create your first flag. In this step you create the flag, then turn it on in your test environment.
- Open the Flags list and click
Create flag. - Set a name, confirm the key, and keep the variation type as boolean.
- Choose initial ON/OFF serving values and create the flag.
- Open the flag detail page, toggle ON, and save the change.
Your flag is now created and serving configuration is live for that environment.
Create your first boolean flag and set initial ON/OFF serving behavior.
1 / 3
4. Retrieve the value of your first feature flag
Now return to your app project. In this step, you initialize the SDK client, provide a user context, and read the flag value from code.
Initialize your Truflag client
Configure the SDK once at startup and pass your environment public key as apiKey.
import { useEffect } from "react";import Flags from "react-featureflags-client"; export default function App() { useEffect(() => { void Flags.configure({ apiKey: process.env.NEXT_PUBLIC_TRUFLAG_CLIENT_KEY!, user: { id: "sandy", attributes: { email: "sandy@testcorp.com", cohort: "general" } }, }); }, []); return <AppRoutes />;}Build your first user context
The user id and attributes determine targeting. For this walkthrough, start with one demo user context.
Retrieve your first flag value
Copy the flag key from the dashboard, then read it with the hook API and a fallback value:
import { useFlag, useFlagsReady } from "react-featureflags-client"; export function CheckoutGate() { const ready = useFlagsReady(); const isNewCheckout = useFlag("new-checkout-experience", false); if (!ready) return <LoadingSkeleton />; return isNewCheckout ? <CheckoutV2 /> : <CheckoutV1 />;}If you turn the flag off in the dashboard, this value updates automatically in-app. The hook is stateful and reacts to live config updates from Truflag.
Integrate your first flag in real app logic
In production, use the flag value to branch user-visible behavior:
if (isNewCheckout) { return renderNewCheckout();} return renderLegacyCheckout();5. Target your first audience
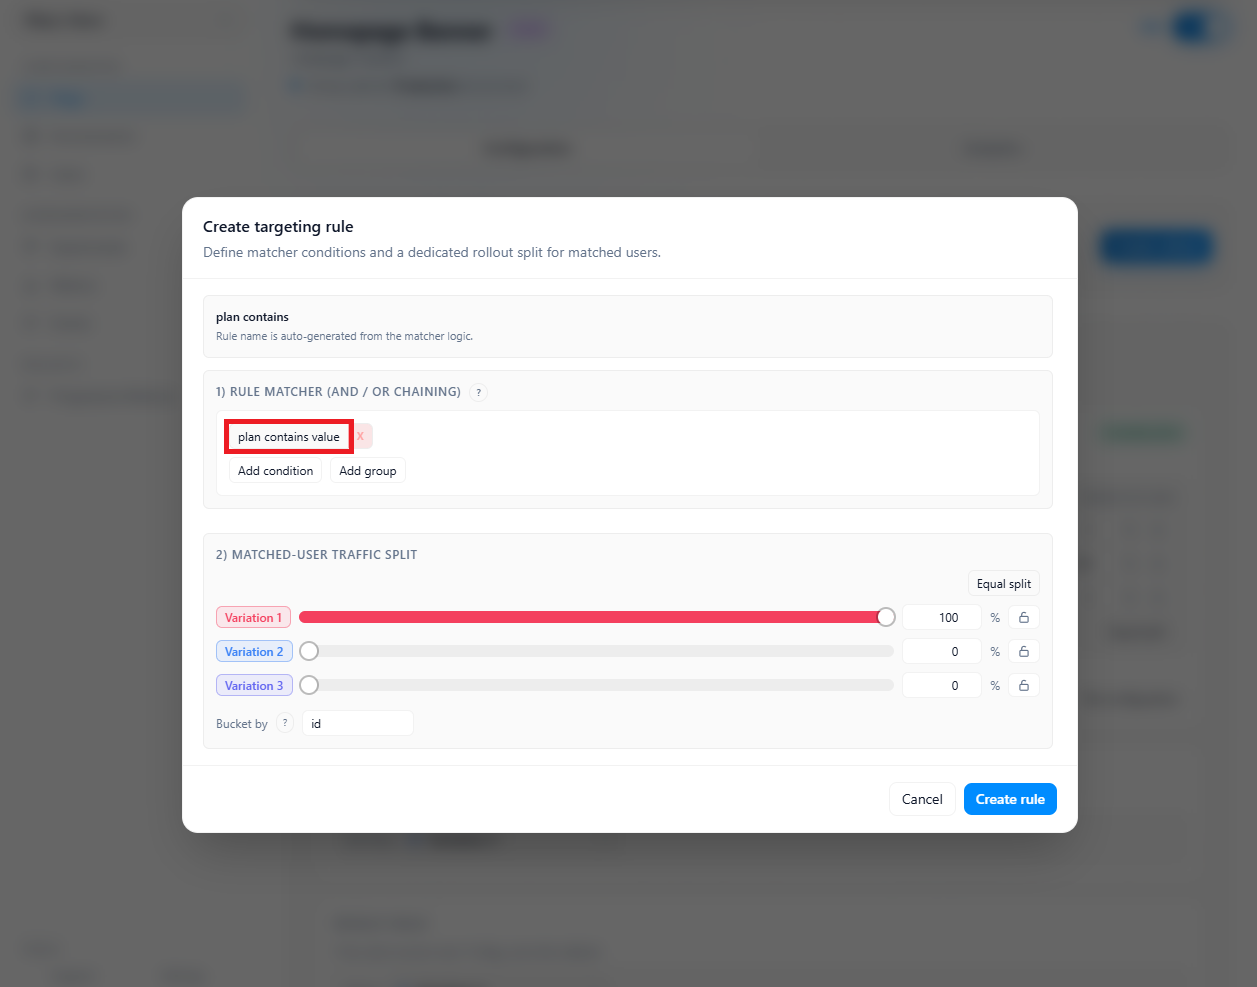
Nice work. Next, create a targeting rule so one audience gets one variation and another audience gets a different one.
- Create a test audience.
- Add a targeting rule.
- Confirm the rule behaves as expected.
Create a demo audience in code
This sample evaluates the same flag for demo users aligned to the rule shown in the screenshots:country is one of US and hasCompletedOnboarding is true.
import Flags from "react-featureflags-client"; const demoUsers = [ { id: "alice", attributes: { country: "US", hasCompletedOnboarding: true } }, { id: "bob", attributes: { country: "US", hasCompletedOnboarding: false } }, { id: "carlos", attributes: { country: "CA", hasCompletedOnboarding: true } }, { id: "dana", attributes: { country: "US", hasCompletedOnboarding: true } },]; for (const user of demoUsers) { await Flags.login(user); const value = Flags.getFlag("new-checkout-experience", false); console.log(user.id, value);}Add your first targeting rule
- Open the flag detail page and create a targeting rule.
- Choose an attribute and value to match your test cohort.
- Set the served variation for matching users.
- Save and publish the targeting changes.
Start by creating a targeting rule from the flag detail view.
1 / 4
Confirm your targeting rule
Run your sample again. Users matching your rule should receive the targeted variation, and users who do not match should follow the default rule path.